February 15, 2022 / Lily Collins
How to Add A Signature in Gmail Account?
If you wish to personalize your outgoing emails in Gmail account with a personal closing message, you can do so easily by using the Gmail signature feature. By creating a Signature in your Gmail account, you can get it automatically added to your Outgoing emails. To know how to add a signature in your Gmail account, follow the step-by-step instructions provided below.
Table of Contents
Steps to Add a Signature in a Gmail account
On Computer
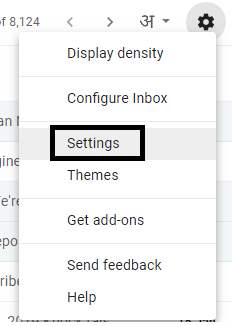
1.) Sign into your Gmail account, click on the Gear icon located on the top-right corner and select Settings option from the drop-down list. You will be taken to the Settings page of your Gmail account.
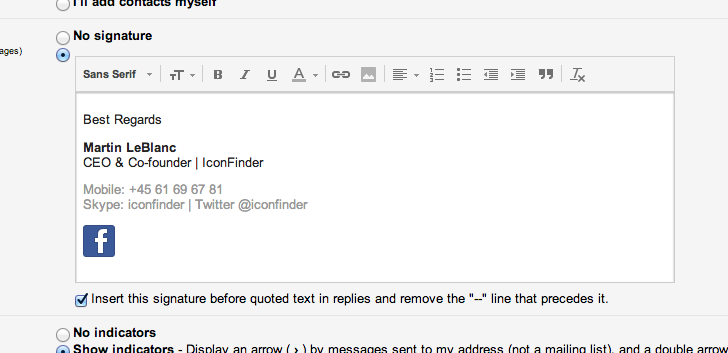
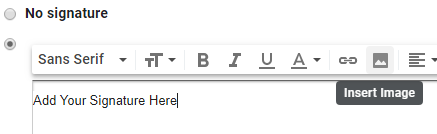
2.) On the Settings page, scroll down to go to the Signature section. Once you are in the Signature section, select the Radio button to add a desired signature for your outgoing email.
4.) After selecting the checkbox for enabling the Signature feature, enter the content for the signature which you wish to add. If you wish to, you can customize your signature using the different options available in the toolbar. You can make changes to the Signature text for Size, Bold, Italic, Underline, Link, Image and various other options.
5.) If you also wish to add an image to your signature, simply click on the Insert Image option located next to Link option. A window will open up on your screen using which you can add an image from Driver, Computer, or Web Address (URL).
6.) Once you are done making the desired changes to the signature, click on the Save Changes button. The signature will get created for your Outgoing emails.
Steps to Add Signature When Using “Send mail as” Feature
If you have “Send mail as” feature activated for sending email from different email addresses added to your Gmail account, you will be able to create a separate signature for each email address as per your requirement. In order to select an email address for a particular signature:
- Click on the drop-down menu located above the signature text box on the Settings page.
- In case, you don’t see the drop-down menu, simply go to the Accounts and Import Settings tab and make sure that the email addresses are listed under “Send mail as” section.
For iPhone & iPad
1.) Open the Gmail app on your iPhone or iPad and tap on the Menu icon (three horizontal lines) located on the upper-left corner of your mobile screen.
2.) Next, you will need to scroll down in the drop-down menu and select the Settings option. You will be taken to the next screen where you will be prompted to select the Google account where you wish to add a signature.
NOTE: This screen will show only if you have multiple Gmail account added to your Gmail app.
3.) Now, scroll down and go to Signature settings option on your iPhone or iPad.
4.) Then, simply activate the Signature setting and add or edit your signature as per your requirement.
5.) Once you are done making the desired changes to the signature, you will need to tap on the Back icon. The signature will be saved to your Gmail account for outgoing emails.
For Android
NOTE: When you create a signature in your Gmail application, it will only appear for all the emails you send using the app. Similarly, if you create a signature on the computer, it will be used only for all the emails you send via Gmail on the web.
1.) Open the Gmail app on your Android device and tap on the Menu icon (three horizontal lines) located on the upper-left corner of your Gmail screen.
2.) Next, scroll down in the drop-down menu and tap on the Settings option. You will be directed to the Settings screen of your Gmail account.
3.) Then, you will need to select the Google account in which you wish to add a signature (in case you have multiple Gmail account).
4.) After that, you will need to tap on the Mobile Signature option and enter the text you wish to add to your outgoing emails.
5.) Once you are done entering the signature text, simply tap on the OK button to confirm your signature. Your Signature will be added to the Gmail account.
After following the instructions provided above, you can send a test email to your own Gmail account and see if the signature is appearing in the email or not.
Leave a Reply