February 15, 2022 / Lily Collins
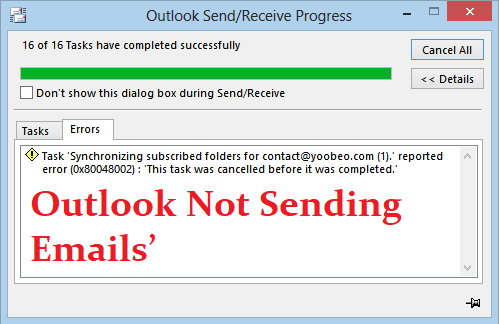
How To Fix ‘Outlook Not Sending Emails’ Error
Not just professional users, but Outlook is widely used by numerous home users across the globe. One of the main reasons is that Outlook has outstanding security features that protect your private data from unexpected hacking and other security threats.
Despite incessant efforts to keep user’s account safe from various tech glitches, there are times when people stumble upon issues. One such problem is ‘Outlook not sending emails’. In this article, we have furnished information/ methods to deal with the specific problem while sending email messages in Outlook.
Error List – Issues That Surface on Screen While Sending Emails
Take a look at the error codes or error messages that you might come across while using Outlook.
- The server could not be found. (Account:account name, POPserver:’mail’, Error Number: 0x800ccc0d)
- No connection could be made because the target machine actively refused it.
- The server has unexpectedly terminated the connection. Possible causes include network problems, server problems, or a long period of inactivity. Account. account name, Server: ‘server name’, Protocol: POP3, Server Response: ‘+OK’, Port: 110, Secure(SSL): No, Error Number: 0x800ccc0f.
- Task ‘server name – Sending and Receiving’ reported error (0x800ccc0f): ‘The connection to the server was interrupted. If the issue continues, contact the server administrator or Internet service provider (ISP). The server responded: ? K’.
- Task ‘SMTP server name – Sending and Receiving’ reported error (0x80042109): ‘Outlook is unable to connect to your outgoing (SMTP) e-mail server. If you continue to receive this message, contact the server administrator or Internet service provider (ISP).’
- Error codes: 0x800ccc15; 0x80042108; 0x800ccc0e; 0x800ccc0b; 0x800ccc79; 0x800ccc67; 0x80040900; 0x800ccc81; 0x80040119; 0x80040600.
Resolution
Use the following methods to get rid of the ‘emails not sending issue in Outlook’.
Table of Contents
9 Method To Fix ‘Outlook Not Sending Emails’
Method – 1: Stay Connected to the Internet
- Open an internet browser
- In the URL address bar, type http://www.microsoft.com or http://www.msn.com and press ‘Enter’
Check whether your internet is working fine or not. If not, see ‘troubleshoot network connectivity problems’ in the browser.
Method – 2: Check Email Account Settings
Ensure that your Outlook email account setting is correct. To check your Outlook email account settings, check the following links.
- How to set up Internet email accounts in Outlook 2007 or 2003 (https://support.office.com/en-us/article/add-an-email-account-to-outlook-6e27792a-9267-4aa4-8bb6-c84ef146101b?redirectSourcePath=%252fen-us%252farticle%252f1CF5C44A-43C1-4332-BB54-0D7545322CC0&ui=en-US&rs=en-US&ad=US)
- How to set up an Internet email account in Outlook 2013 or 2016 (https://support.microsoft.com/en-us/help/2758902/how-to-set-up-an-internet-email-account-in-outlook-2013-or-2016)
- How to configure Outlook Express 6.0 for Internet mail (https://support.microsoft.com/en-us/help/171163)
- How to set up an Internet email account in Outlook 2010 (https://support.office.com/en-us/article/add-an-email-account-to-outlook-6e27792a-9267-4aa4-8bb6-c84ef146101b?ui=en-US&rs=en-US&ad=US)
Method – 3: Check Your Antivirus Manufacturer’s Website for Additional Suggestions
Does your antivirus software include an email scanning feature? If yes, you will have to conduct additional configuration tasks to use Outlook together with the antivirus software.
Method – 4: Configure Firewall Software and Enable Outlook to Access Internet
Performing this workaround would make some changes or make your system more vulnerable to viruses. We encourage users not to carry out this task unless other methods fail to bring you adequate results. Implement this technique at your own risk.
So, you need to configure your firewall software and enable Outlook.exe (for Outlook) to access the Internet. Contact your Internet Service Providers or system administrator if you are not sure about the ports. By default, port 110 is for incoming access, and port 25 is for outgoing access.
Method – 5: Repair Your Outlook
Consider repairing your Outlook to fix the error. Check the link below to repair your Outlook.
Method – 6: Your Email Profile Should Work Correctly
How do you know whether your Outlook email profile works fine? To check, you need to create a new email profile and ensure that you are able to send emails (using the newly created email profile). If you are able to do that, configure the new Outlook profile as the default profile. Follow the below steps –
- Step – 1: You Need to Locate Default Outlook Data File
- Go to ‘Control Panel’ and click ‘Mail’
- Click ‘Show Profiles’ in the ‘Mail Setup – Outlook’ dialog box
- Here, you need to select your existing Outlook profile and click ‘Properties’
- Click ‘Data Files’ in the ‘Mail Setup – Outlook’ dialog box
- In the ‘Account Settings’ dialog box, choose the ‘Data Files’ tab. Take note of the name and location of the default data file (the default data file can be indicated through a check mark)
- Now, click ‘Close’
- Step – 2: Create a New Outlook Profile
To create a new Outlook profile, you must follow one of the methods mentioned underneath:
Method A: Use Auto Account Setup and Create a POP3 or IMAP Email Account
If your email server supports both POP3 and IMAP, by default, the auto account setup will create a new IMAP account. If you wish to create a POP3 account, the manual steps need to be followed (given below). For email server supporting only POP3, a POP3 account will be created.
- In the ‘Control Panel’, you need to click ‘Mail’
- Click ‘Show Profiles’ in the ‘Mail Setup – Outlook’ dialog box
- In the ‘Mail’ dialog box on the ‘General’ tab, click ‘Add’
- You need to type a new profile name in the ‘New Profile’ dialog box and click ‘OK’
- Type your email account information in the ‘Add New Account’ dialog box and click ‘Next’
- Click ‘Finish’
Method B: Create a POP3 or IMAP Account (manually)
- In the ‘Control Panel’, you need to click ‘Mail’
- Click ‘Show Profiles’ in the ‘Mail Setup – Outlook’ dialog box
- In the ‘Mail’ dialog box on the ‘General’ tab, click ‘Add’
- You need to type a new profile name in the ‘New Profile’ dialog box and click ‘OK’
- Now, select “Manually configure server settings or additional server types” in the ‘Add New Account’ and click ‘Next’
- Select ‘Internet E-mail’ in the ‘Choose Service’ dialog box and click ‘Next’
- In the dialog box ‘Internet E-mail Settings’, provide your account details (contact your ISP if you do not know the correct account details)
- To test your account, click ‘Test Account Settings’
- Choose ‘Existing Outlook Data File’ and click ‘Browse’
- You need to locate and select the Outlook data file in the ‘Open Outlook Data File’ dialog box and click ‘OK’
- Hit the ‘Next’ button
- Click ‘Close’ (in the ‘Test Account Settings’ dialog box)
- Now, click ‘Finish’
Step – 3: Configure Your Next Outlook Profile as Default Profile
Configure the new Outlook profile as your default profile if it works correctly. Move all your email messages to the new profile.
- You must choose ‘Always use this profile’ (on the ‘General’ tab of the ‘Mail’ dialog box)
- Under ‘Always use this profile’, click the drop-down and select the new profile
- Click ‘OK’ to close the ‘Mail’ dialog box
- To export your messages to an Outlook Data File (.pst) from the previous Outlook email profile, use the ‘Import and Export’ wizard. Now, Import the Outlook Data File (.pst) to the new Outlook email profile.
To export, read this article (https://support.office.com/en-us/article/export-or-backup-email-contacts-and-calendar-to-an-outlook-pst-file-14252b52-3075-4e9b-be4e-ff9ef1068f91?ocmsassetID=HA102534110&CorrelationId=71909dbd-77a7-49fa-8970-2b8e554a8a61&ui=en-US&rs=en-US&ad=US)
To import, read this article (https://support.office.com/en-us/article/import-email-contacts-and-calendar-from-an-outlook-pst-file-431a8e9a-f99f-4d5f-ae48-ded54b3440ac?ocmsassetID=HA102505743&ctt=5&origin=ha102534110&CorrelationId=22f861b4-85d5-4678-9e6b-398589a5c026&ui=en-US&rs=en-US&ad=US)
Method – 7: Open Outlook in Safe Mode
Check out the steps below to start Outlook in safe mode (based on your operating system)
For Windows Vista, Windows 7, Windows, 8, Windows 8.1, or Windows 10:
- In Windows Vista or Windows 7, click ‘Start’
- In Windows 8 or Windows 8.1, swipe in from right and tap ‘Search’. For people using a mouse, they need to point to the lower right corner of the screen and select ‘Search’
- In Windows 10, click the ‘Search’ box in the taskbar
- Now, in the Search box, you need to type ‘outlook.exe/safe’
- Press ‘Enter’
For Windows XP, Windows 2000, or Windows 2003
- Start > Run
- Type ‘outlook.exe/safe’
- Click ‘OK’
Method – 8: Inbox Repair Tool to Repair .pst File
What is a .pst file? A .pst file is a personal folder (file) which stores all your email messages, notes, contacts, calendar items, notes, other data. When the file is corrupted, Outlook users won’t be able to send any emails. The corrupt file needs to be repaired. Go through the link (https://support.microsoft.com/en-us/help/272227/how-to-repair-your-outlook-personal-folder-file-pst) and understand what you need to do.
Method – 9: Clean up the Outbox Messages
You must perform the underneath steps to clean up your Outbox for any email message stuck in there.
- Open ‘Outlook’, click ‘Send/ Receive’
- Click ‘Work Offline’ (it stops Outlook from sending emails)
- Click ‘Outbox’ and perform one of the following actions:
- Move the message: You need to move the message to ‘Drafts’
- Delete the message: To delete a message, right-click the message and click ‘Delete’
Note: You need to close Outlook if the ‘Outlook is transmitting the message’ pops up on the screen. Close and wait for it to exit. Use Task Manager in Windows and ascertain that the outlook.exe process is complete. Start Outlook again and repeat step 2.
- You need to click the tab ‘Send/ Receive’. Now, to de-select it, click ‘Work Offline’.
Additional Methods for These Issues
Besides the above issues, one might come across the following errors –
- A time-out occurred while communicating with the server 0x800ccc19.
- The operation timed out waiting for a response from the receiving (POP) server 0x8004210a.
- Error code: 0x8007000c
- Error code: 0x8004210b
Outlook has the following additional methods for these issues.
Additional Methods
For issues 1 & 2, Increase the Server Time-out Setting:
Often users come across a time-out error message along with the error message. In such a case, they are suggested to increase the server time-out setting in Outlook. Go through one of the methods illustrated underneath if you wish to increase the server time-out setting (based on the version of Outlook).
For Outlook 2010 and Later –
- Open Outlook and click ‘Info’ (on the ‘Files’ menu)
- Now, click ‘Account Settings’ and then choose ‘Account Settings’ from the list
- Choose the right ‘POP3’ account and click ‘Change’
- Hit the ‘More Settings’ option and then select the ‘Advanced’ tab
- Increase the server-time setting to resolve the issue (until the error is resolved)
For Outlook 2007 –
- Start Outlook
- Go to the ‘Tools’ menu and select ‘Account Settings’
- Here, you need to select the ‘POP3’ account and click ‘Change’
- Hit the ‘More Settings’ option and then select the ‘Advanced’ tab
- Increase the server-time setting to resolve the issue (until the error is resolved)
For Outlook 2003 and Outlook 2002 –
- Start Outlook
- Go to the ‘Tools’ menu and select ‘E-mail Settings’
- Select ‘View or change existing e-mail accounts’ and select ‘Next’
- Here, you need to select the ‘POP3’ account and click ‘Change’
- Hit the ‘More Settings’ option and then select the ‘Advanced’ tab
- Increase the server-time setting to resolve the issue (until the error is resolved)
For Outlook 2000 Corporate or Workgroup Mode (CW) –
- Start Outlook
- Go to the ‘Tools’ menu and select ‘Settings’
- Click ‘Internet E-mail’ (on the ‘Services’ tab) and click ‘Properties’
- Select the ‘Advanced’ tab
- Increase the server-time setting to resolve the issue (until the error is resolved)
For Outlook 200 Internet Mail Only (IMO) –
- Start Outlook
- Go to the ‘Tools’ menu and select ‘Accounts’
- Click the target account and select ‘Properties’
- Select the ‘Advanced’ tab
- Increase the server-time setting to resolve the issue (until the error is resolved)
For issue no. 3, run the MAPI Repair Tool:
There are chances that you may receive the “Sending and Receiving reported error (0x8007000E): Out of memory or system resources. Close some windows or programs and try again” message upon sending or receiving email messages in Outlook if the MAPI32.dll file is incorrect or damaged.
To get rid of the error, you need to ‘run the MAPI Repair Tool (Fixmapi.exe)’. The file can be found in any of these folders –
- C:WindowsSystem32
- C:WinntSystem32
For issue no. 4, verify All SMTP Email IDs in Distribution List:
Error 0x8004210b is likely to occur if an SMTP address in the distribution list is incorrectly formed or corrupted. Check each and every email address and ensure that they are all good, correct. Also, make efforts to identify invalid email addresses by sending test email messages to each distribution list member.
So, still facing email sending issues in your Outlook account? Hopefully, not! If you do, you should reach out to the Outlook professionals on the customer care number or live chat for an instant solution.
Leave a Reply