February 15, 2022 / Lily Collins
CenturyTel Email Settings For iPhone & iPad
A household name in the United States, CenturyTel, presently known as CenturyLink, offers a plethora of services. If you have signed up with CenturyTel email, your webmail account boasts numerous amazing features and enhancements. It is an all-inclusive messaging platform offering high-performance, reliable email, calendaring, address books, task lists, and more. Below, we have furnished the unique features and benefits of having CenturyTel email account –
- Email:
- Easy to compose and send messages.
- Create folders and tags to organize mail.
- Track mail exchanges using the “Conversation” feature.
- Add signatures to your messages.
- Add attachments to your messages.
- Create filters to send emails to designated folders.
- Address Book:
- Calendar.
- Set up how your calendar looks.
- Export and import other calendar programs.
- Create and Schedule events, meetings, and appointments.
- Create and manage multiple calendars.
- Create and manage multiple address books.
- Export and import contact lists.
- Tasks:
- Create-to-do tasks.
- Create task lists.
- Set the priority, manage tasks, and track the progress.
- Preferences:
- Configure the account settings.
- Customize the mailbox view.
- Shortcut key combinations for quick navigation within the mailbox
The best part of creating a CenturyTel email is that it lets you send and receive messages from your iPhone and iPad. All you have to do is to create an account when you install your service or you can create it later.
- When Installing CenturyTel Service: When you install the CenturyTel high-speed internet service, you have the option to immediately create an account.
- Select the option “I want to create a new account as my login to my CenturyTel home page”.
- Click “Next”.
- Now, enter the login details (create a password)
- Select a secret question and corresponding answer.
- You should now click “Next”.
- That’s it!
- As Per Your Convenience:If you didn’t create an account while installing the service, you can always set up your CenturyTel email account at a time that fits your schedule.
- Click here.
- Click the email button (It is located on the top right side of the page).
- Now, create an account.
After you have created your account you can check your email using webmail.
- Go to the home page.
- Click the green email button, enter your login credentials, and click the “Log in” button.
Since you have an Apple device (iPhone and iPad), you will learn here CenturyTel email settings for iPhone & iPad.
Read on to know how to add a CenturyTel email account to your iPhone and iPad.
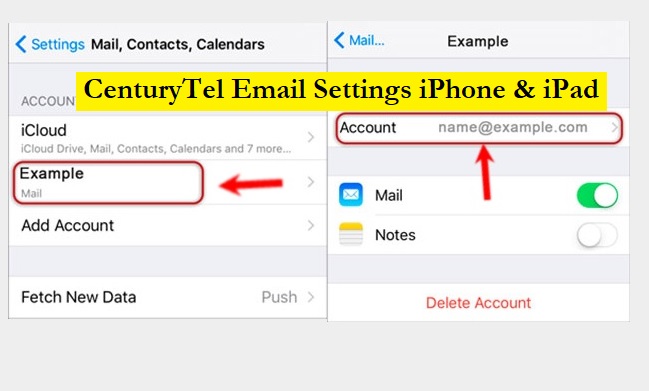
Check CenturyTel Email Settings iPhone & iPad – iPhone Guide to Setup CenturyTel/ CenturyLink Mail
If you are an iPhone or iPad user, here’s the workaround for you to set up your CenturyTel email in the Mail app on your iOS device.
Set up CenturyLink Email on iPhone/ iPad –
- Unlock your Apple device and go to “Settings”.
- Scroll down and select the “Mail, Contacts and Calendars” option.
- Look for the option “Add Account”. It should be available below an iCloud tag.
- Tap the “Other” option if you don’t see your email service provider on the list.
- If you don’t find CenturyTel or CenturyLink email account, mention the same.
- Choose the “Add Mail Account” option and provide the following information –
- Name:Enter your complete name.
- Email Address: It should be your CenturyTel email address. The email address is your username.
- Password:Enter your CenturyLink.net email account password.
- Description: CenturyTel
- Click the “Next” button and then choose “IMAP” under the incoming mail server.
- Make sure you enter the following details –
- Hostname: mail.centurylink.net
- Username:It should be your CenturyTel email address. The email address is your username.
- Password: Enter your CenturyLink.net email account password.
- Then choose “SMTP” under incoming mail server.
- Make sure you enter the following details –
- Hostname:smtp.centurylink.net
- Username: It should be your CenturyTel email address. The email address is your username.
- Password: Enter your CenturyLink.net email account password.
- Click the “Save” button.
- Navigate to “Settings” and click “Your CenturyTel Account”.
- Now, select “Advanced” and under incoming settings provide the following details –
- SSL: Yes
- Server Port:993
- Authentication: Password
- Under outgoing settings provide the following details –
- SSL: Yes
- Server Port: 587
- Authentication: Password
- There you go!
You have correctly configured CenturyLink/ CenturyTel email settings on iPhone & iPad. Now, sending and receiving your CenturyTel emails won’t be a problem while on the go.
If Enter Account Settings Manually –
When Mail can’t find the email settings, you can carry out the task manually.
- Choose POP or IMAP for your new account.
- Enter the details for Outgoing Mail Server and Incoming Mail Server.
- Tap “Next”.
- Nap “Finish”.
Leave a Reply