February 15, 2022 / Lily Collins
Gmail Read Receipt Without Recipient Knowing
If you always wanted to have an option included in Gmail which can allow you to know whether the email you sent to a recipient was read or not, well, you will still need to wait as Gmail doesn’t seem to be offering this feature to “Gmail.com” users, though the feature is available for Gmail for Work or School (set up by administrator).
While Gmail doesn’t offer an inbuilt feature to get a read receipt, however, if you still want to track your recipient, there are workarounds that you can make use of. In this guide, you will get to learn one way that can help you get read receipts of the emails you send without letting the recipient know about it. So, below is the information that you can use to get a read receipt in your Gmail account.
Table of Contents
Guide of Gmail Read Receipt without Recipient Knowing
Gmail Plug-Ins
As said above, there is no in-built tool offered in Gmail that can allow you to read receipt for the emails you send, however, there are numerous third-party read receipt plug-ins that you can use with your Gmail and easily track your receipt. One of such read receipt tool is offered by ContactMonkey.
While the read receipt feature offered by Outlook has some limitations, ContactMonkey offers an excellent Read Receipt which easily builds into your inbox, allowing you to check who is opening your email and who is not. The tool created by the team of ContactMonkey is capable of:
- Providing insights into what happens to your emails without letting the recipient even know about it.
- Configure Gmail read receipts, making them run smoothly and automatically in the background of your account.
- Providing information as to how many times your email was opened, From where it was opened, whether any links in the email were clicked or not, at what time and day it was opened, and using which device it was read.
Although the Read Receipt tool by Contact Monkey is available on paid-basis, if you wish to try it for free, you can follow these steps:
1.) Steps to Use ContactMonkey Read Receipt Tool
- On your web browser, go to the ContactMonkey free trial page.
- Once you are on the ContactMonkey free trial page, you will need to scroll down and enter your details in the provided fields.
- Once you are done entering the required details in the provided fields, you will need to click on the SIGN-UP button.
- You can use this free trial of the ContactMonkey Read Receipt tool for the next 7 days to know which recipient is opening emails sent by you and who is not.
NOTE: When filling the form, make sure to select the radio button next to Gmail before clicking on the SIGN-UP button.
Once you have signed up for this tool, you will need to make sure of the following when sending an email from your Gmail account.
- Once your Gmail will be set up with the ContactMonkey Read Receipt tool, you will see two new buttons in the Compose box of your Gmail account – Track Message & Track Links.
- Make sure to select the checkbox next to the two new options – Track Message & Track Links option before sending an email.
- Now, once you would have sent an email and your email start to appear in the new sidebar in your Gmail account, you will be able to see which emails have been opened.
2.) Boomerang Extension For Gmail to Read Receipt
Chrome Browser Extension
Another tool that you can use to get read receipt in your Gmail is using the Boomerang for Gmail. Boomerang is basically a browser extension that you to need to install on your Chrome browser. Once you install it Boomerang extension in your Chrome browser, you get an option added in the Compose window of your Gmail account.
To install Boomerang in your Chrome browser
- Open Chrome browser on your computer and go to Chrome Web Store.
- In the Chrome Web Store, search for Boomerang for Gmail using the search bar located on the top-left corner of the screen.
- From the search result, click on the Boomerang for Gmail extension. Then, click on the Add to Chrome button on the next screen to download and install on your browser.
NOTE: Before adding this extension to your browser, make sure that you are already logged in to your Gmail account.
- As you will click on the Add to Chrome button, Boomerang extension will begin installing to your browser and it will automatically take you to your Gmail account.
- In your Gmail account, you will be provided instructions as to what all you can do using this extension.
- Simply go through the prompts and in the end, you will find the Boomerang option added to the Compose box of your Gmail account. The option would appear like this:
- The “Send Later” section is the option that will get added to your Gmail account.
- The Boomerang extension will not only allow you to get read receipt of the emails you send but also lets you:
- Schedule your email
- Customize the time interval in which you wish to get the read receipt.
- Resend the email to the recipient who didn’t open it.
NOTE: While Boomerang Extension helps you get read receipt for the emails you send, however, the recipient does get a request for the same and he/she may refuse to prevent Boomerang from sending a read receipt.
3.) MailTracker For Gmail Read Receipt on Your iPhone or iPad
MailTracker – IOS Mobile Application
If you are using an iPhone or iPad and wish to get read receipt for the emails you send from your Gmail account using these devices, you can easily do so by installing a mobile application. Apple Mail doesn’t offer an in-built feature to track who reads your emails and how long they look at them. While there are several applications available on the App Store that you can use to get read receipt, one of them that you can use is MailTracker.
You can easily download the MailTracker app from the App Store of your iPhone. This application allows you to send an email from your Mail application like you normally do. The MailTracker application not only provides you read receipt but also provides information that how long the recipient read your email, how many times he/she viewed it, and also the device and location from which it was viewed.
4.) How To Activating Gmail Read Receipt on Android
Track – Email Tracking Application For Android
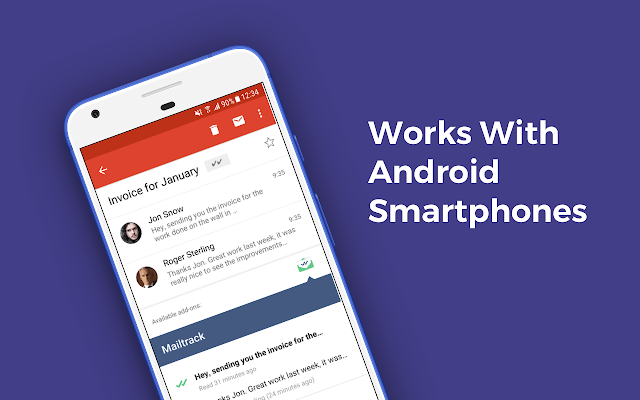
Just like for iPhone and iPad there are numerous email tracking applications available, similarly there several mobile applications available for your Gmail Application. One of the mobile applications that can help you get read receipt for the emails you send using your Gmail application (Android) is Track – Email Tracking application.
Email Tracking application is a good email tracker for your Gmail app to know when and where your email gets read and forwarded. This application is not only capable of tracking email sent from Gmail or Inbox on Android, but also from Gmail on Desktop. You can easily get this app on your Android device by following these steps:
- Go to the Google Play Store on your device.
- Search for the “Track – Email Tracking” app using the search bar.
- Download and install the app on your mobile.
- Once installed, open the application and follow the on-screen prompts to configure your Gmail app for getting a read receipt.
So, these are some of the workarounds that can help you get read receipt for the emails you send from your Gmail account using Desktop, iPhone, Android, and Gmail Application.
Now, if you really keen on getting read receipt for the emails you send using your Gmail account from Google only, there is an option to do so. However, to make use of this option to request or return a read receipt, you must be using Gmail for work or school configured by the administrator. In case, you are using a Gmail.com account, the below mentioned will not help you in requesting a read receipt.
To Request a Read Receipt
- Open Gmail on your computer and sign in to your account.
- Once logged in to your account, you will need to click on the Compose button.
- Now, you will need to compose your email as you normally do.
- After composing your email, you will need to go to the bottom left section and click on the More options where you will need to select More send options.
- From the More Send option, you will need to select the Request read receipt option.
- After that, simply send your message and you will receive the read receipt.
NOTE: You will be able to see a read receipt in your Inbox. The recipient may have to approve the read receipt before you get a notification for it.
To Return a Read Receipt
If you have been requested by a sender to provide read receipt, but your organization wants you to approve it first, then you will need to follow these steps:
- Open Gmail on your computer and sign in to your account.
- Once logged in to your account, check the emails as you normally do and select an option:
- Click Send receipts to send the receipt now.
- Click Not now to send the receipt later. In this case, you will be prompted to send the receipt the next time you open the email.
Now, as you have ample information on different ways to get read receipts in your Gmail account on different devices, feel free to use them to track the emails you send.


Leave a Reply